How do I add the new Xerox ColorQube copier to my Windows computer?

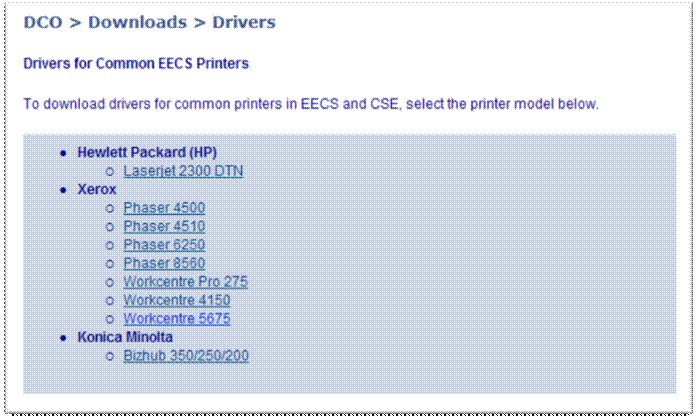
Before we can install the new printer, we first need to download drivers for it. To do this, open your web browser and go to http://www.eecs.umich.edu/dco/files/drivers/drivers.php. On this page, select ‘ColorQube 9303’.

http://www.eecs.umich.edu/dco/files/images/windows_addcopier_1.gif

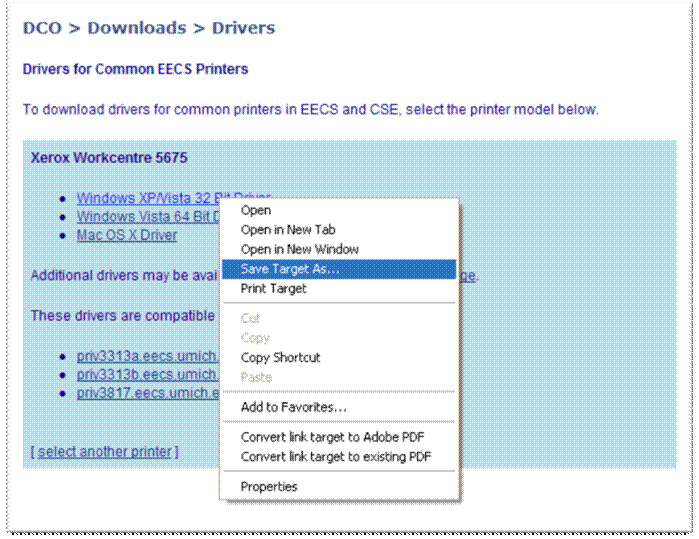
Click on your appropriate operating system, and then select 'save'.
http://www.eecs.umich.edu/dco/files/images/windows_addcopier_2.gif

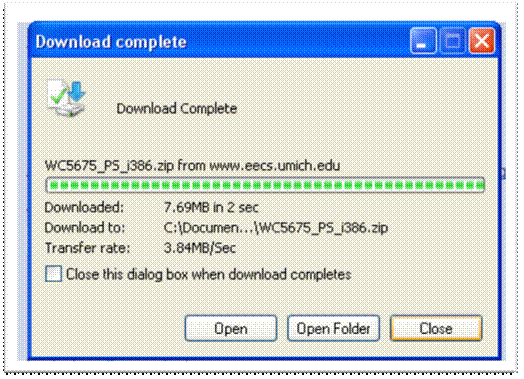
Find your download dialogue box, and double click on the file you just downloaded.
http://www.eecs.umich.edu/dco/files/images/windows_addcopier_4.gif

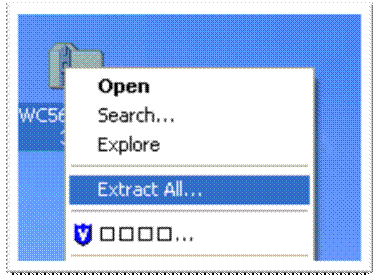
An explorer window will open. Click 'extract all files'
http://www.eecs.umich.edu/dco/files/images/windows_addcopier_5.gif

Click 'Browse'

http://www.eecs.umich.edu/dco/files/images/windows_addcopier_5.gif

Click 'Desktop' and then click 'ok'

http://www.eecs.umich.edu/dco/files/images/windows_addcopier_5.gif

Add the word '\drivers' to the end of the file path and then click 'extract'.

http://www.eecs.umich.edu/dco/files/images/windows_addcopier_5.gif

Now we can go ahead and add the printer.

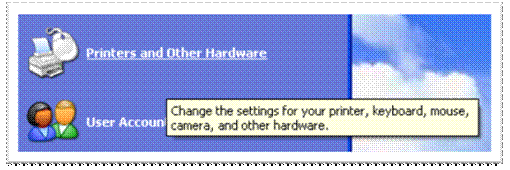
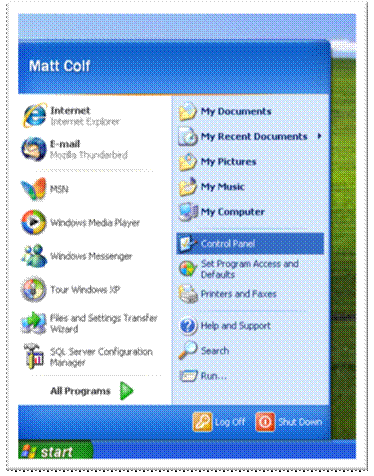
Start by opening the Start Menu and choosing ‘Control Panel’.
http://www.eecs.umich.edu/dco/files/images/windows_addcopier_6.gif

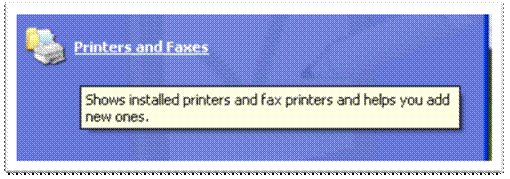
Now, select ‘Devices and Printers’.

http://www.eecs.umich.edu/dco/files/images/windows_addcopier_7.gif

Select ‘Add a Printer’.

http://www.eecs.umich.edu/dco/files/images/windows_addcopier_8.gif

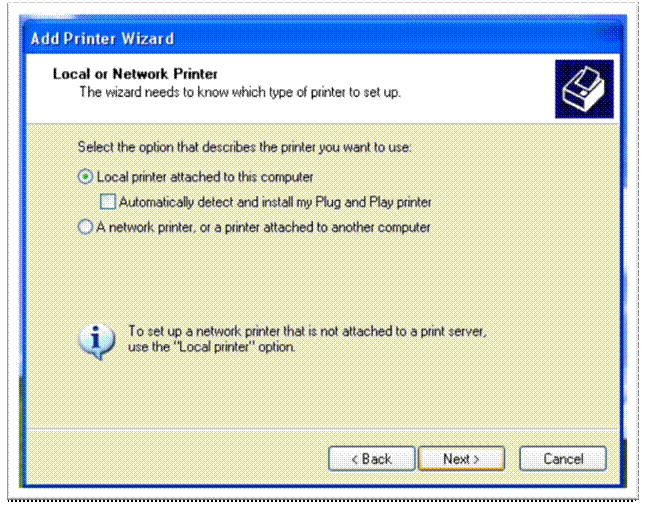
Select 'Add a Local Printer'.

http://www.eecs.umich.edu/dco/files/images/windows_addcopier_11.gif

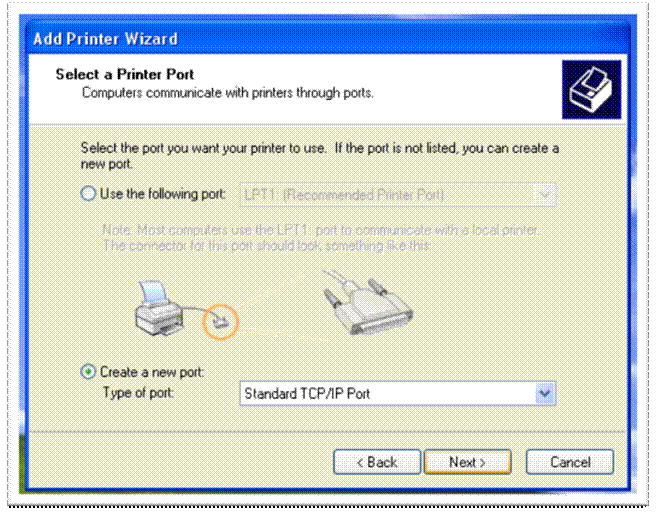
Select 'Create a new port', and then from the drop down menu, select 'Standard TCP/IP Port'.
http://www.eecs.umich.edu/dco/files/images/windows_addcopier_12.gif

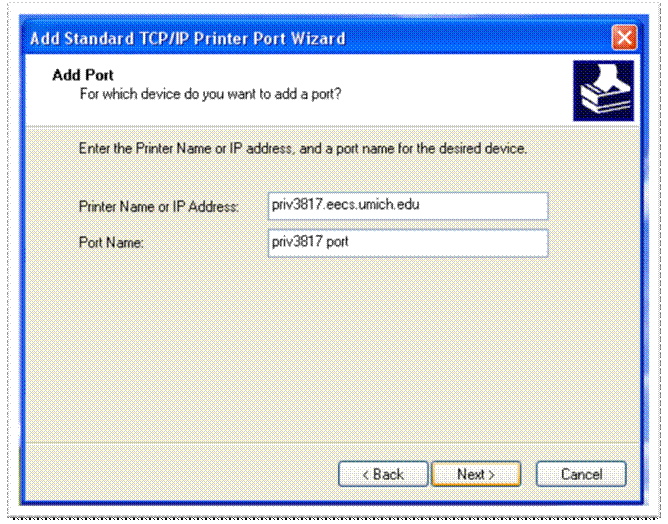
Enter ‘priv3313c.eecs.umich.edu’ as the printer name and ‘priv3313c port’ for the port name. Uncheck 'Query the printer', and then click ‘Next’.
http://www.eecs.umich.edu/dco/files/images/windows_addcopier_13.gif

Windows may tell you that 'additional port information is required'. Simply hit next again.

http://www.eecs.umich.edu/dco/files/images/windows_addcopier_14.gif

Now we need to specify what driver to use for the newly created printer. On this screen, select ‘Have Disk’.
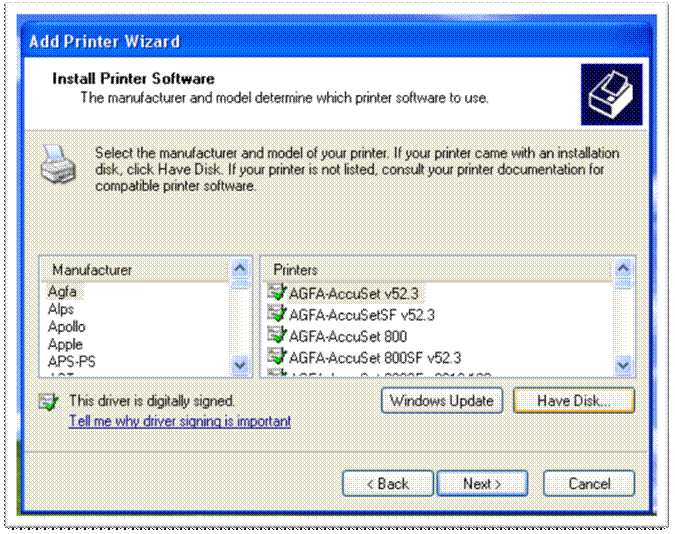
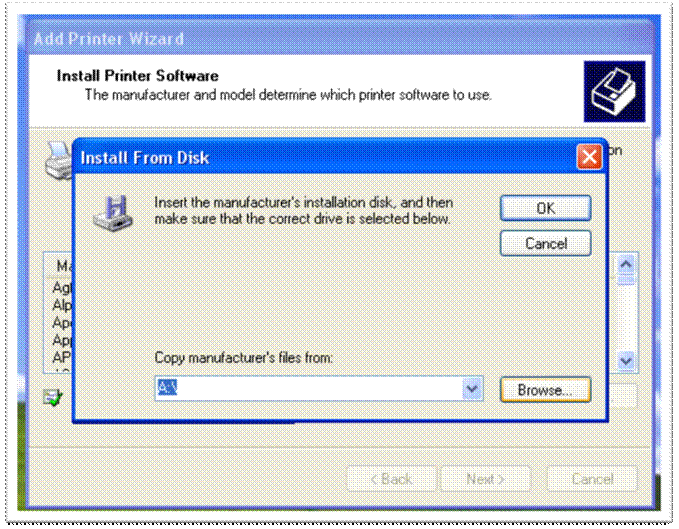
http://www.eecs.umich.edu/dco/files/images/windows_addcopier_15.gif

  1. When the dialogue appears, click ‘browse’.

http://www.eecs.umich.edu/dco/files/images/windows_addcopier_16.gif

  1. In the drop down box, select ‘Desktop’.

http://www.eecs.umich.edu/dco/files/images/windows_addcopier_17.gif

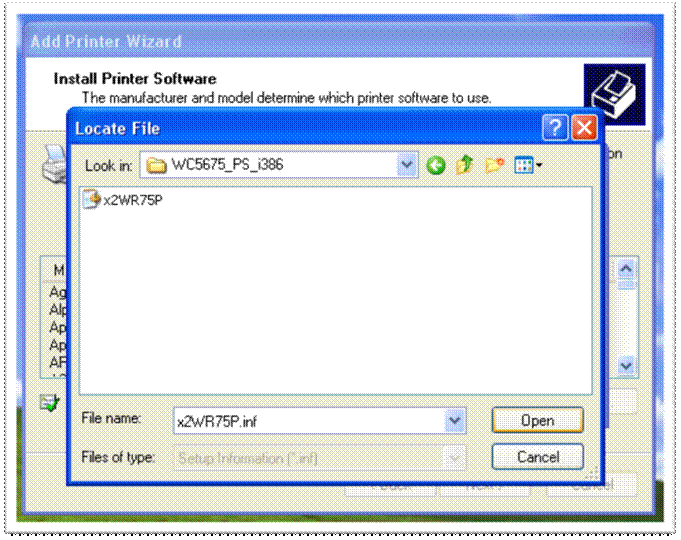
  1. Now, double click the folder that we extracted to the desktop earlier and click ‘Open’.

http://www.eecs.umich.edu/dco/files/images/windows_addcopier_18.gif

Once the dialogue closes, click ‘OK’ to continue.
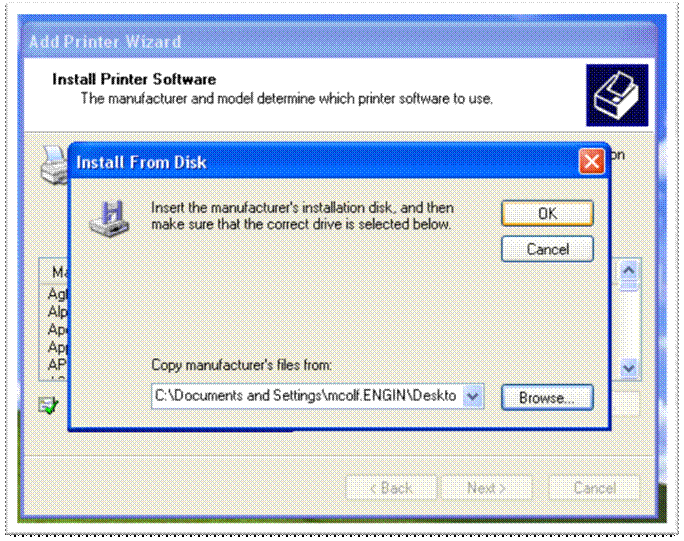
http://www.eecs.umich.edu/dco/files/images/windows_addcopier_19.gif

On the next screen, select ‘Xerox ColorQube 9301 PS’ as the model and click ‘Next’.
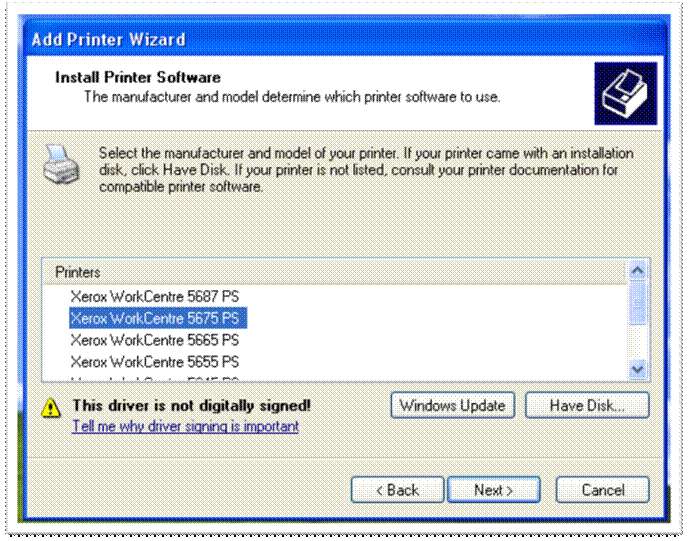
http://www.eecs.umich.edu/dco/files/images/windows_addcopier_20.gif

You may name the printer whatever you wish. I leave the default name as "Xerox ColorQube 9301 PS'. Select next again. If windows asks for permission to install the driver, simply select 'yes'.
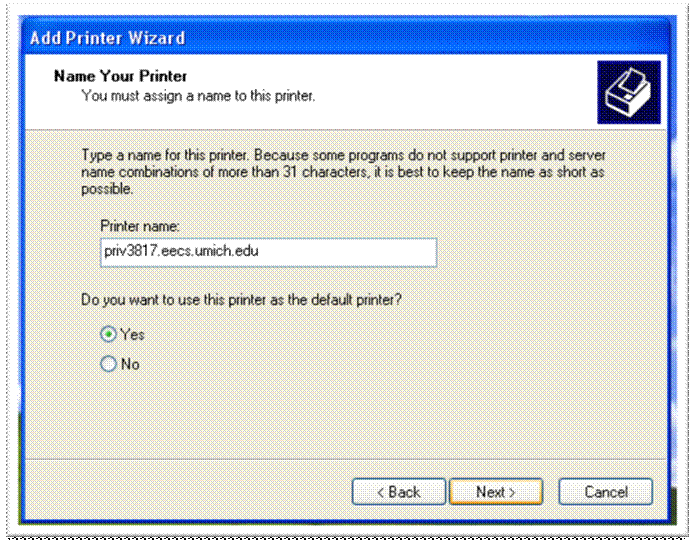
http://www.eecs.umich.edu/dco/files/images/windows_addcopier_21.gif

  1. On the next screen, choose 'Do not share this printer' and then select 'next'.

http://www.eecs.umich.edu/dco/files/images/windows_addcopier_21.gif

  1. Choose the ‘Do not share this printer’ and click ‘Next’.

http://www.eecs.umich.edu/dco/files/images/windows_addcopier_22.gif

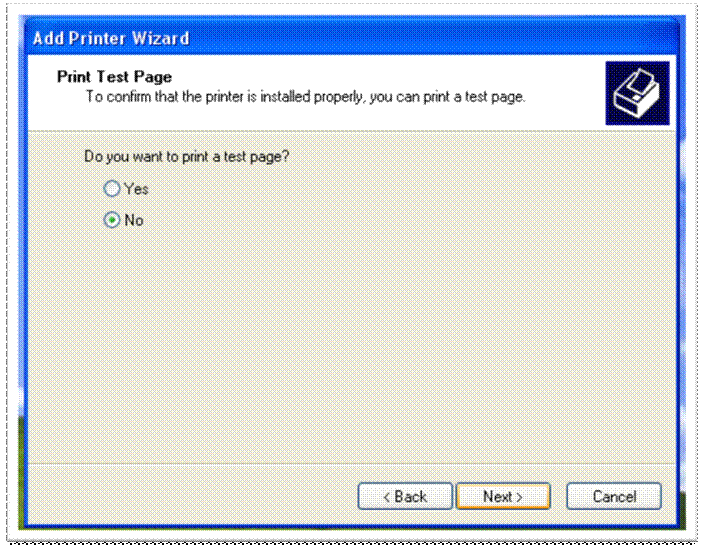
  1. When asked to print a test page, select ‘No’ and then click ‘Next’. We need to do some additional configuration before it will work properly.

http://www.eecs.umich.edu/dco/files/images/windows_addcopier_23.gif

Because this driver has not passed ‘Windows Logo’ testing, you will be shown a warning. Simply click ‘Continue Anyway’.
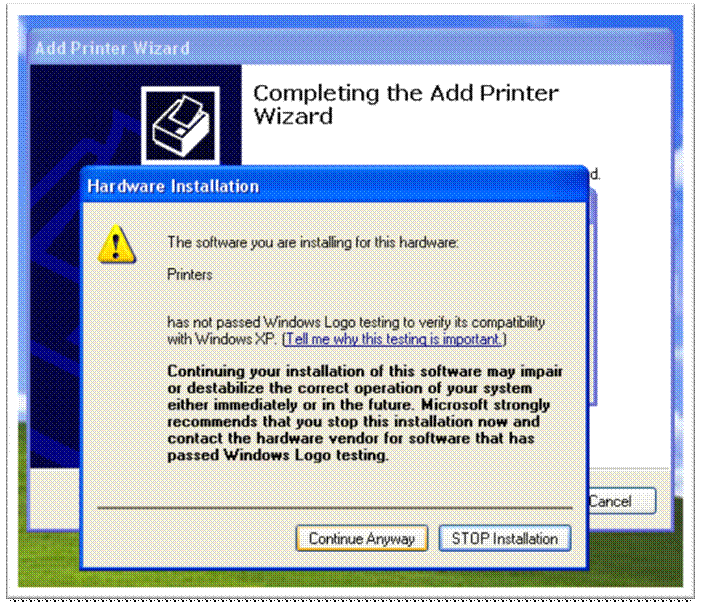
http://www.eecs.umich.edu/dco/files/images/windows_addcopier_24.gif

This will complete the ‘Add Printer’ wizard. Now, go back to the printers window, right click on the newly created printer, and choose ‘Properties’.
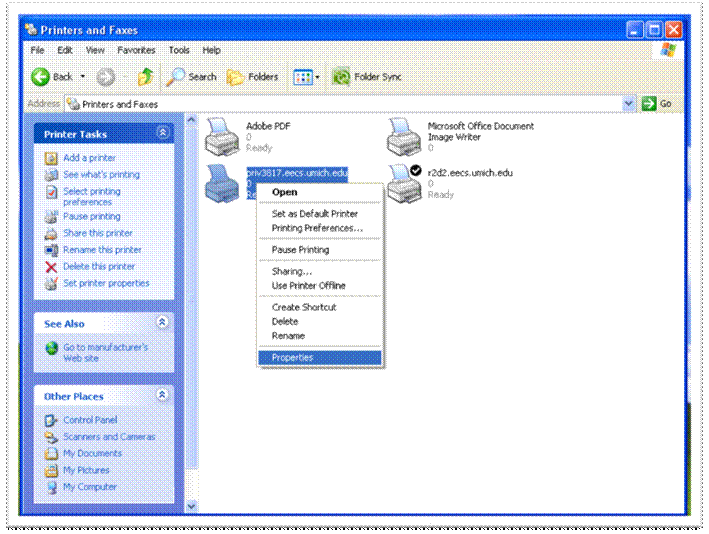
http://www.eecs.umich.edu/dco/files/images/windows_addcopier_25.gif

When the dialogue appears, open the ‘configuration’ tab and click the ‘Accounting’ button.
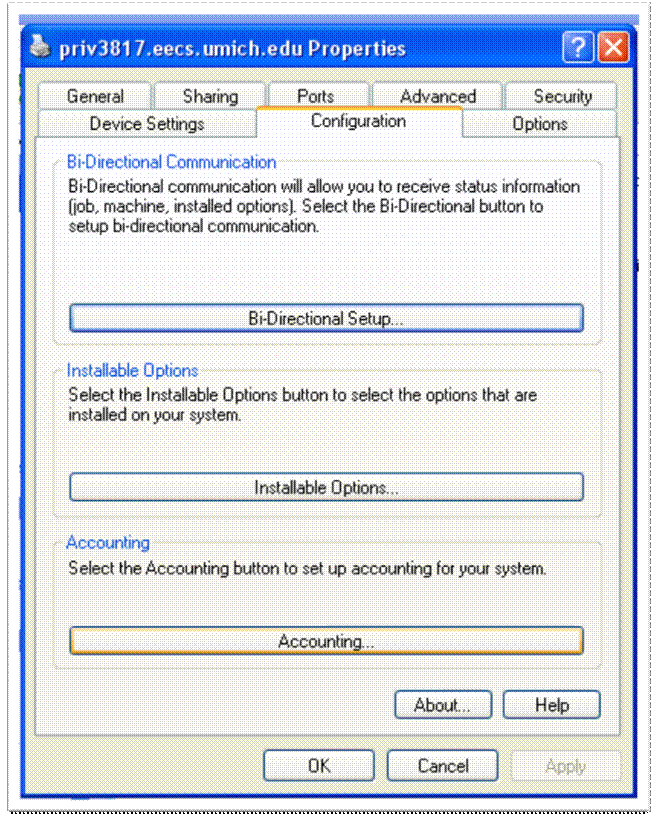
http://www.eecs.umich.edu/dco/files/images/windows_addcopier_26.gif

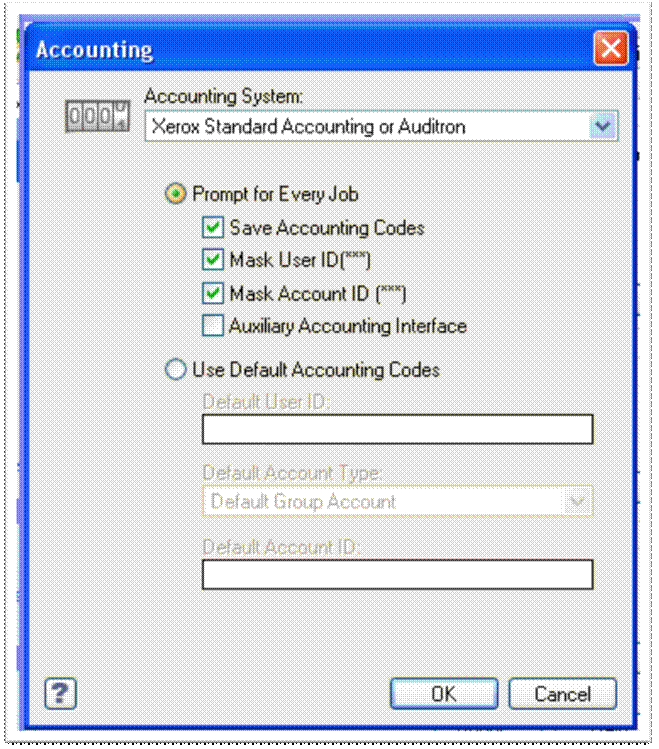
In the accounting window, choose ‘Xerox Standard Accounting’ from the drop down box and click ‘OK’.
http://www.eecs.umich.edu/dco/files/images/windows_addcopier_27.gif

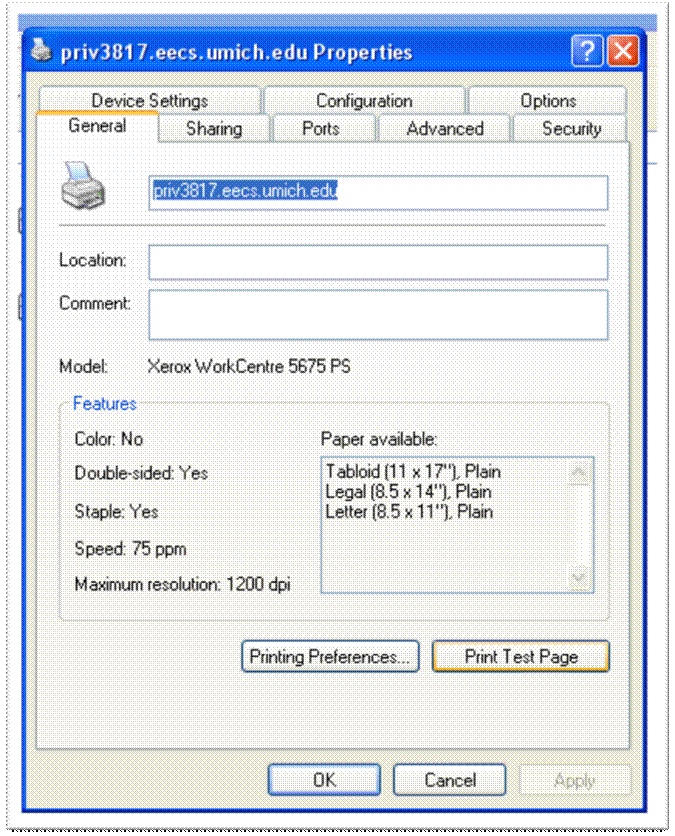
Now, once that dialogue closes, choose the ‘General’ tab and click ‘Print Test Page’.
http://www.eecs.umich.edu/dco/files/images/windows_addcopier_28.gif

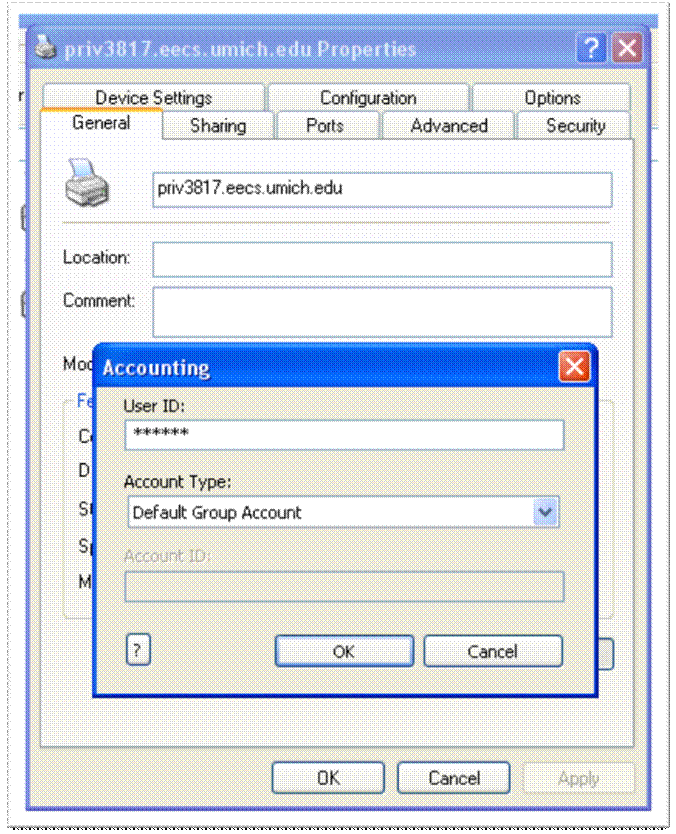
You will be prompted to enter your User ID before printing continues.
http://www.eecs.umich.edu/dco/files/images/windows_addcopier_29.gif

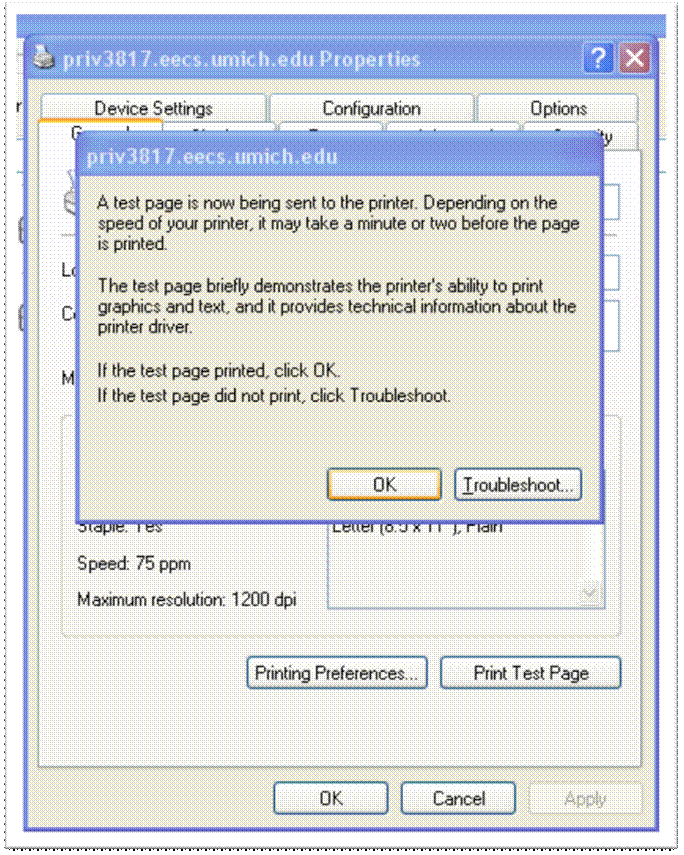
Now, click ‘OK’ and go check the printer to see if it printed correctly.
http://www.eecs.umich.edu/dco/files/images/windows_addcopier_30.gif

This concludes the tutorial. If you have any additional problems, please contact us.