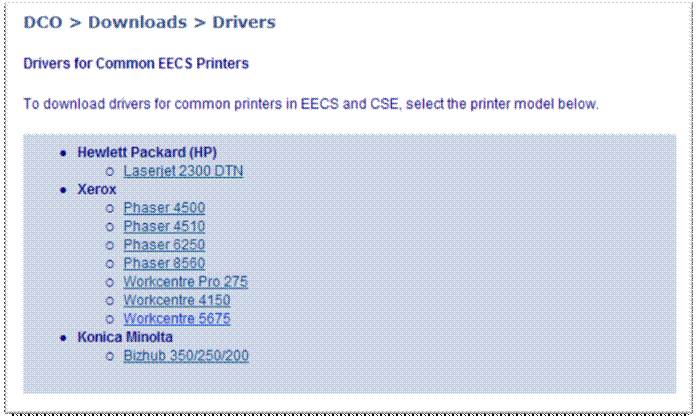
- Before we can install the new printer, we first need to download drivers for it. To do this, open your web browser and go to http://www.eecs.umich.edu/dco/files/drivers/drivers.php. On this page, select ‘Workcentre 5675’.
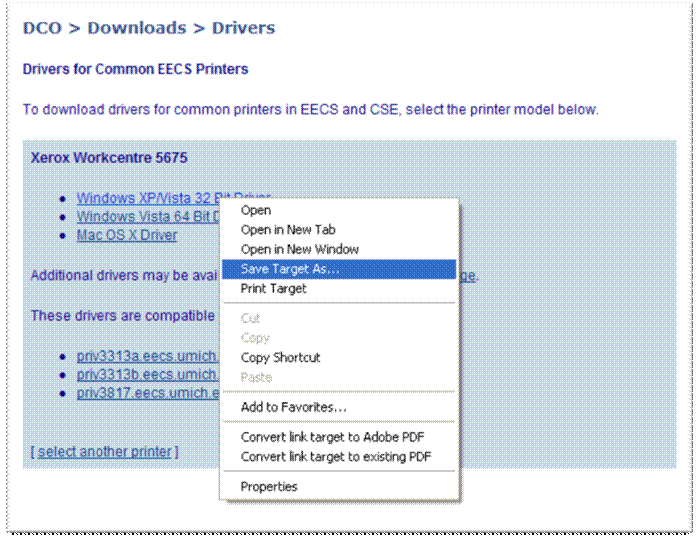
- On the next page, right click on the Windows XP drivers and select ‘Save Target As…’.
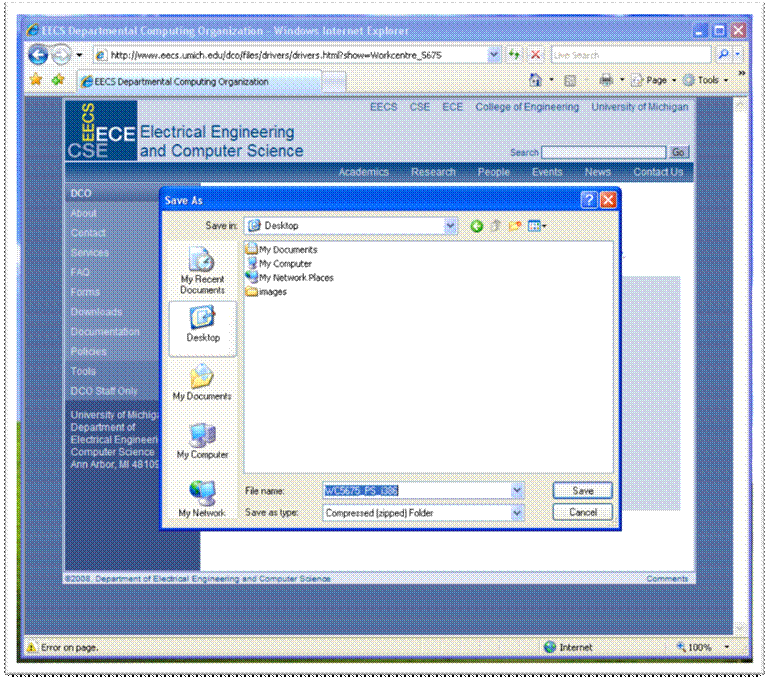
- When the dialogue opens, click the ‘Desktop’ button and then click ‘save’.
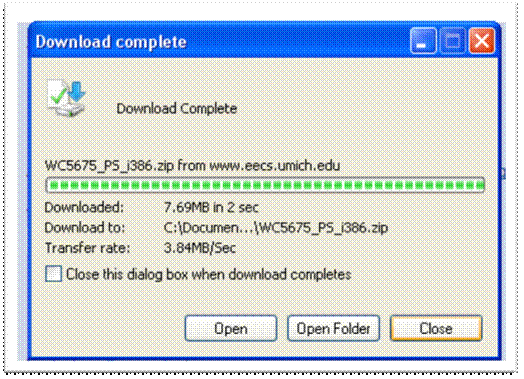
- When the download completes, click close.
- Now, go to the desktop and find the file that just downloaded. Right click on it and select ‘Extract All’.
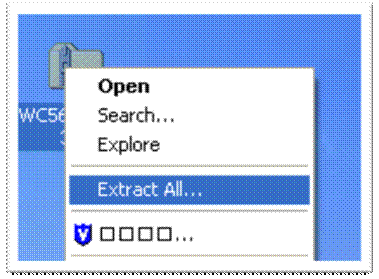
- This will start the ‘Extraction Wizard’. Keep all default values and click next. Once the wizard completes, click ‘Finish’ to exit.
- The required printer drivers should now appear in a folder on your desktop.
- Now we can go ahead and add the printer.
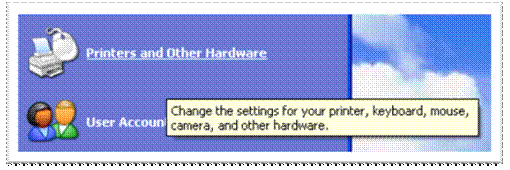
- Start by opening the Start Menu and choosing ‘Control Panel’.

- Now, select ‘Printers and Other Hardware’.
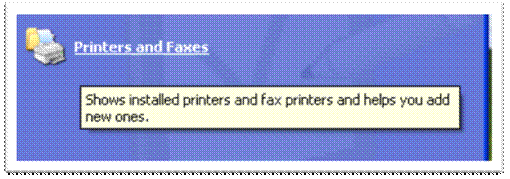
- Select ‘Printers and Faxes’.
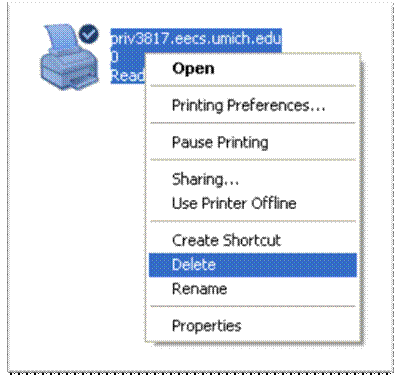
- If you already have the old copier installed, simply right click on its icon and select ‘Delete’.
- Now, create a new printer by selecting ‘Add a Printer’ from the menu on the left.

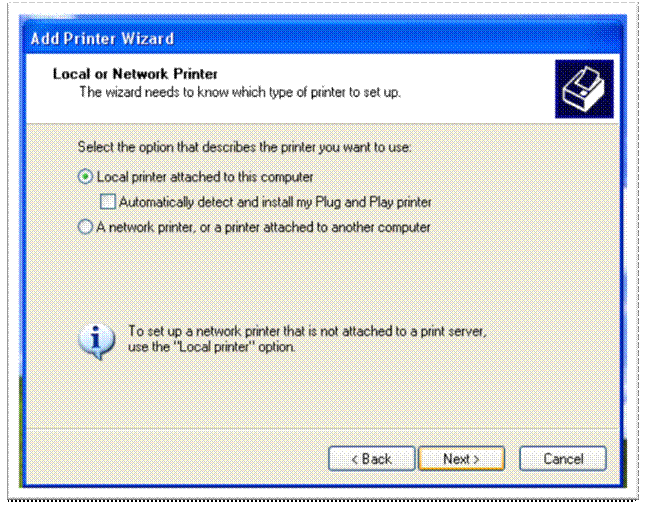
- This will launch the ‘Add Printer’ wizard. On the first screen, select ‘Local Printer…’ and UNCHECK ‘automatically detect…’.
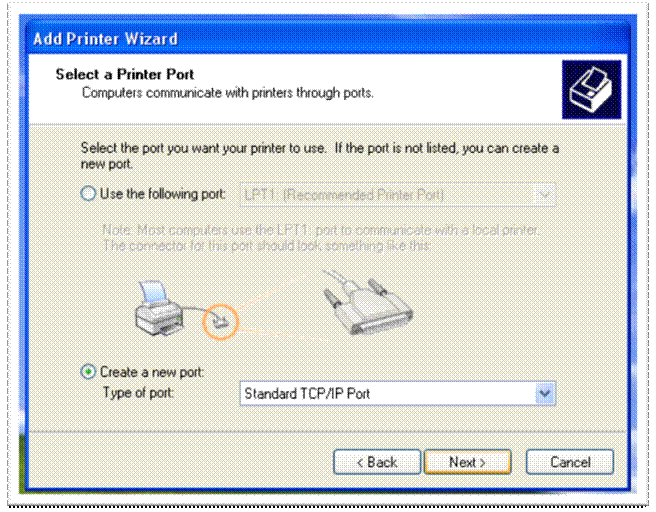
- Now, we need to create a new printer port. Select the ‘Create a new port’ option and select ‘Standard TCP/IP Port’ as the type and then click ‘Next’.
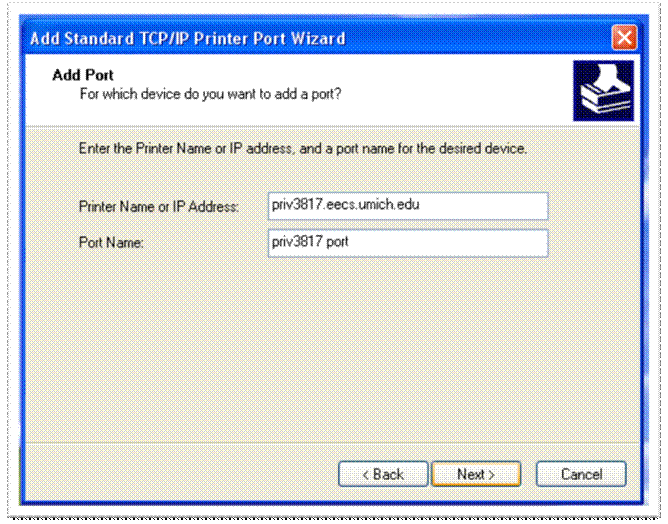
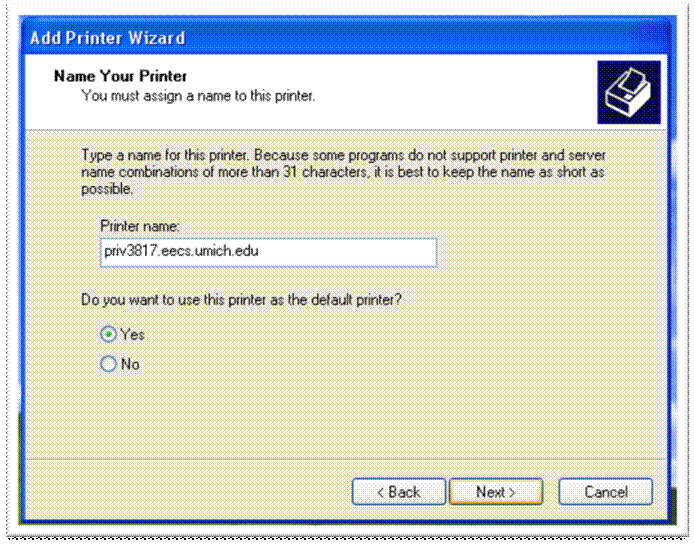
- Enter ‘priv3817.eecs.umich.edu’ as the printer name and ‘priv3817 port’ for the port name and then click ‘Next’.
- Select ‘Finish’ to complete the port wizard.

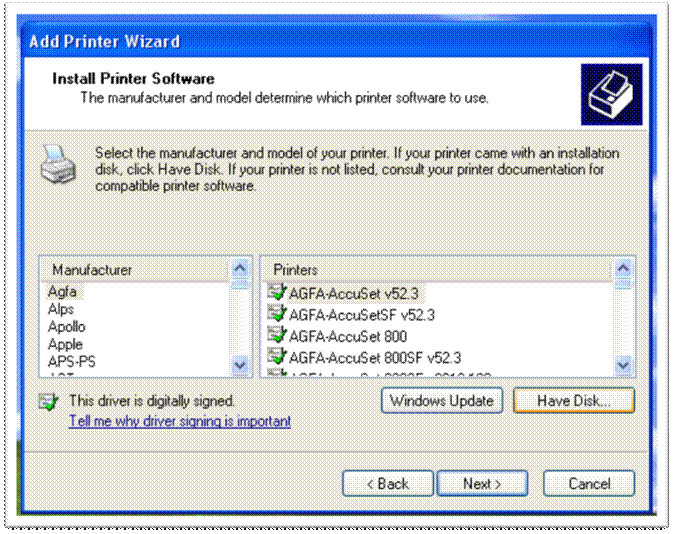
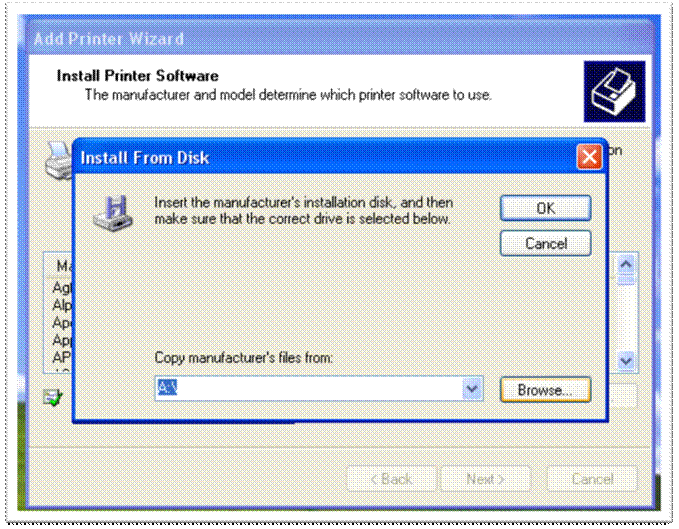
- Now we need to specify what driver to use for the newly created printer. On this screen, select ‘Have Disk’.
- When the dialogue appears, click ‘browse’.
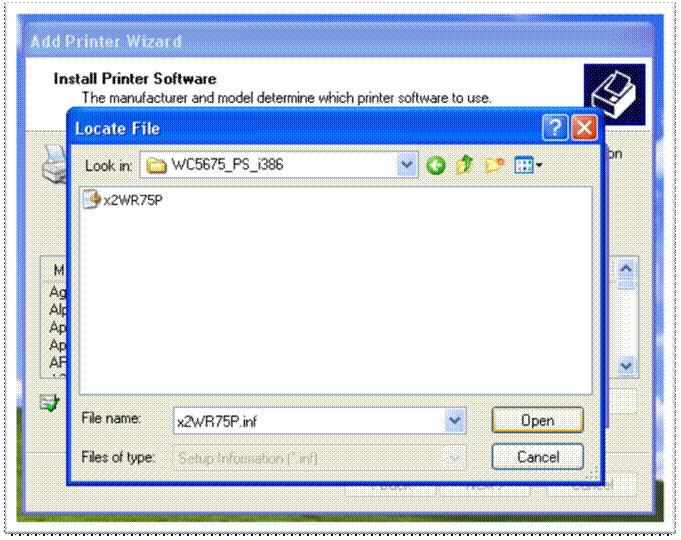
- In the drop down box, select ‘Desktop’.

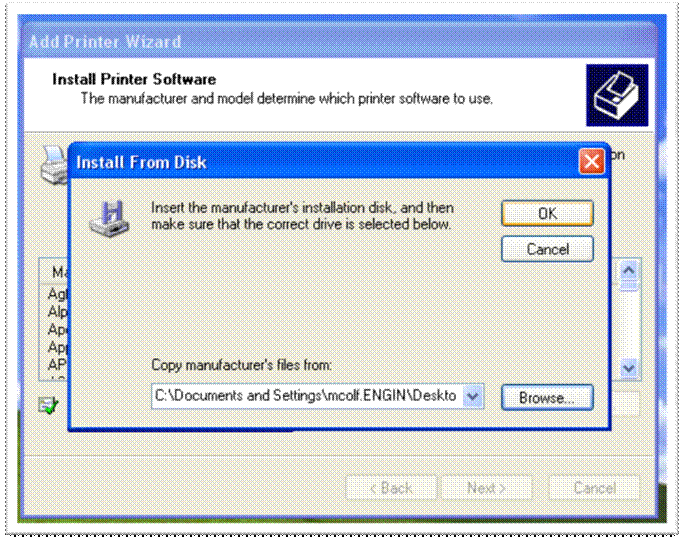
- Now, double click the folder on the desktop that contains the drivers you extracted earlier and then click ‘Open’.
- Once the dialogue closes, click ‘OK’ to continue.
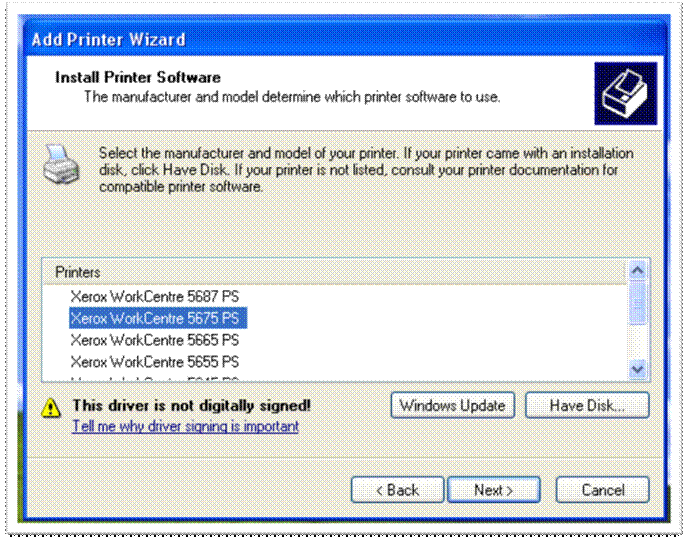
- On the next screen, select ‘Xerox Workcentre 5675 PS’ as the model and click ‘Next’.
- On the next screen, choose whether or not this should be your default printer and then click ‘Next’ to continue.
- Choose the ‘Do not share this printer’ and click ‘Next’.

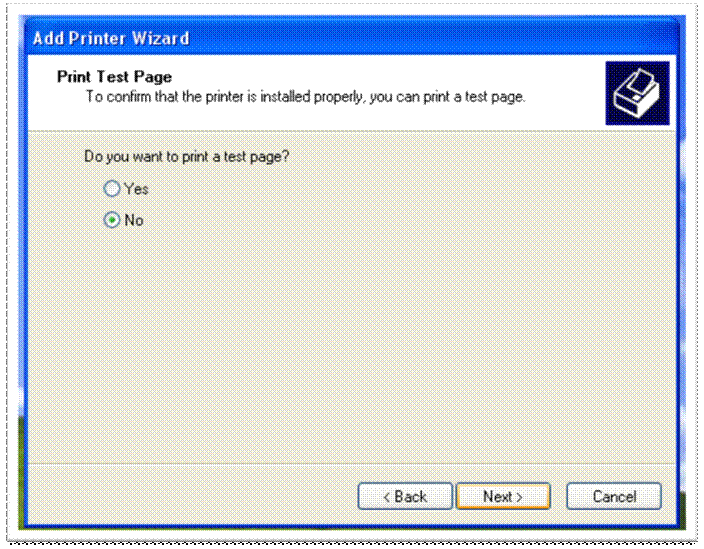
- When asked to print a test page, select ‘No’ and then click ‘Next’. We need to do some additional configuration before it will work properly.
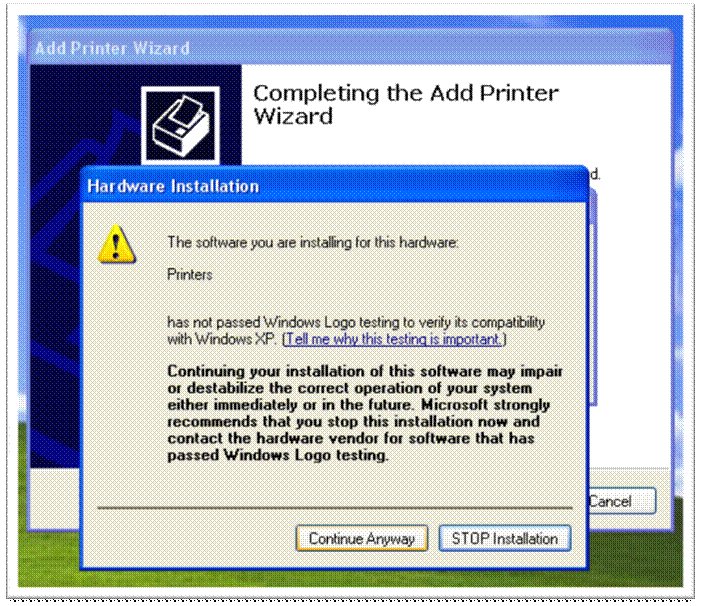
- Because this driver has not passed ‘Windows Logo’ testing, you will be shown a warning. Simply click ‘Continue Anyway’.
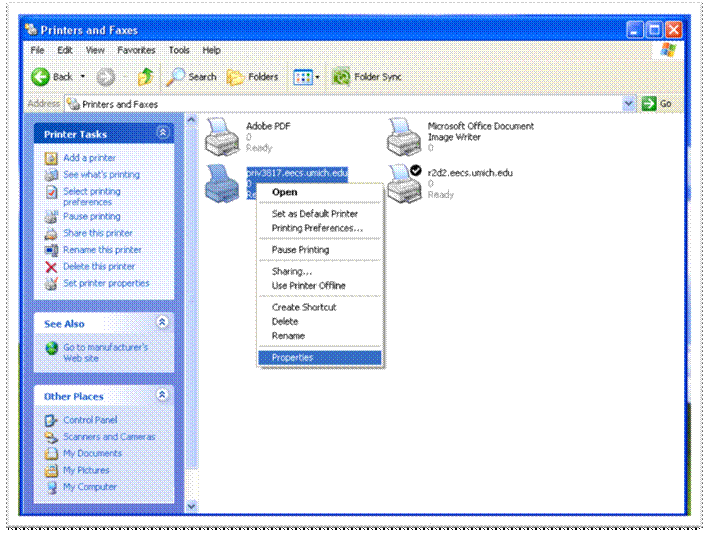
- This will complete the ‘Add Printer’ wizard. Now, go back to the printers window, right click on the newly created printer, and choose ‘Properties’.
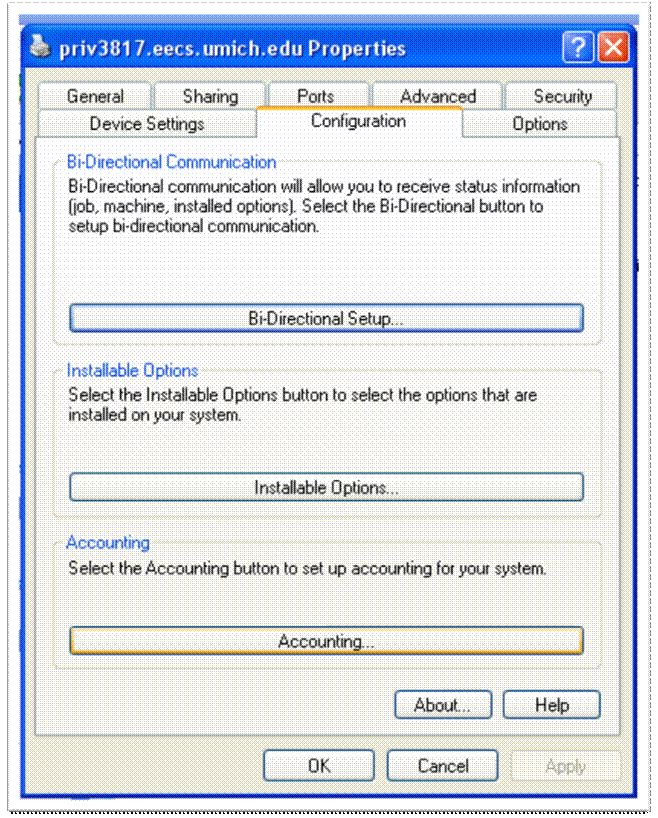
- When the dialogue appears, open the ‘configuration’ tab and click the ‘Accounting’ button.
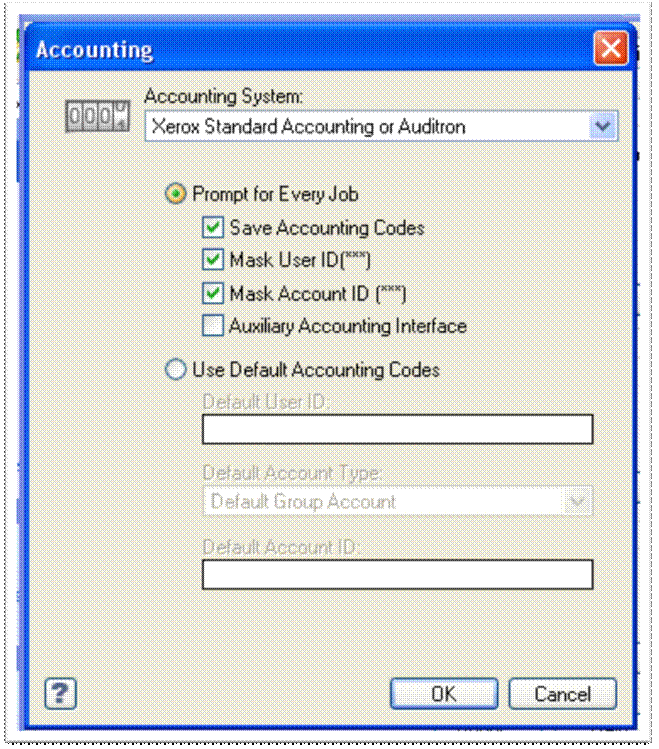
- In the accounting window, choose ‘Xerox Standard Accounting’ from the drop down box and click ‘OK’.
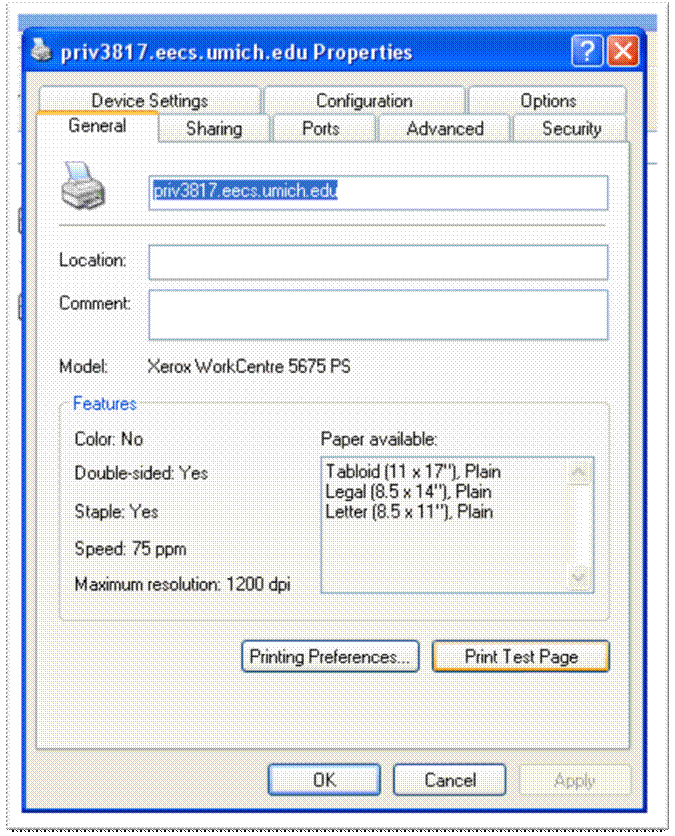
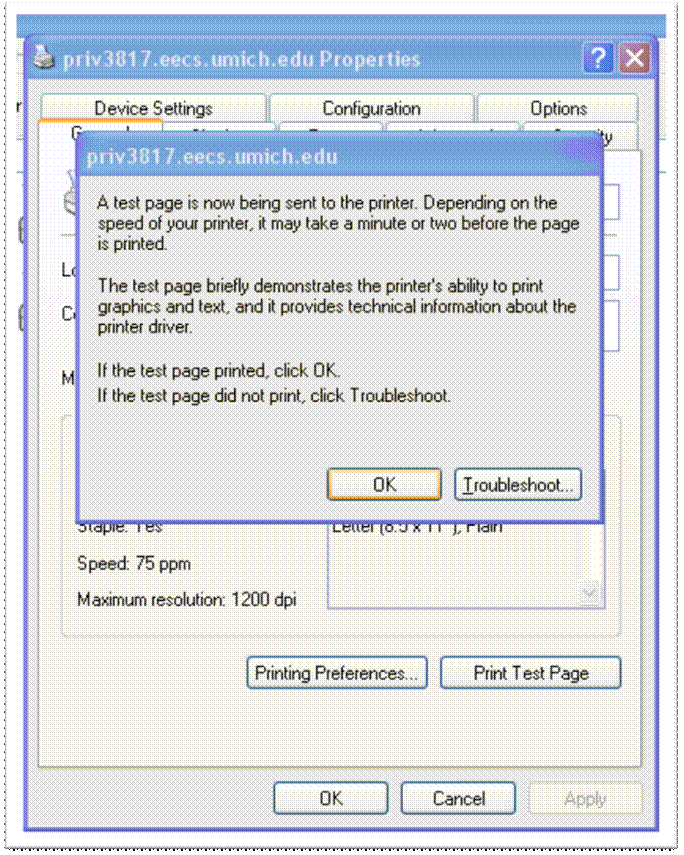
- Now, once that dialogue closes, choose the ‘General’ tab and click ‘Print Test Page’.
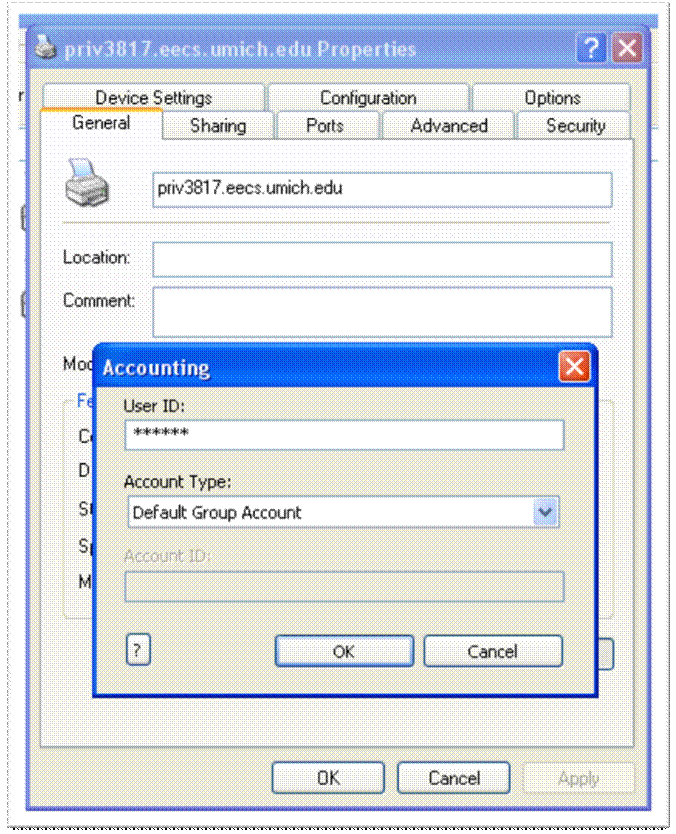
- You will be prompted to enter your User ID before printing continues.
- Now, click ‘OK’ and go check the printer to see if it printed correctly.
This concludes the tutorial. If you have any additional problems, please contact us.
 | Do you need further assistance? We're here to help. Give us a call, send an email, or just stop by one of our offices. |
Powered by LionWiki | Admin | Incoming Links
|