DCO > Services > Windows 10 to 11 Upgrade
|
-
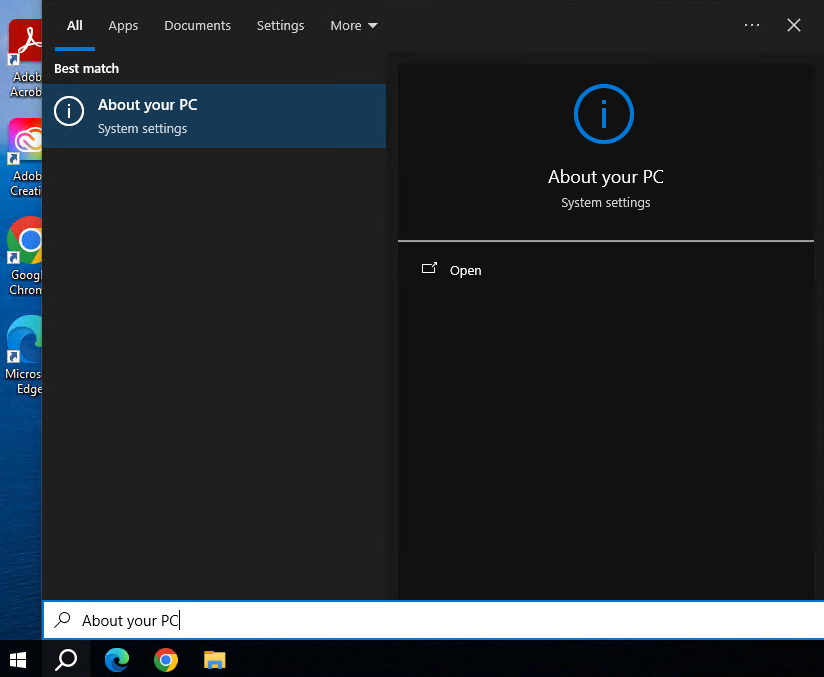
First you need to check if you have Windows 10 or 11. In order to do that, click on the Windows Search Bar to the right of the Start button which is in the bottom left corner of your Desktop. In the search bar type About and click the About your PC option.
-
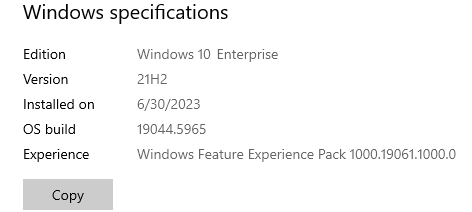
Under Windows Specifications it will either say Windows 10 Enterprise or Windows 11 Enterprise. If it says Windows 11 Enterprise (or Windows 10 IoT Enterprise LTSC or Windows 11 IoT Enterprise LTSC) then you don't need to do anything. If it says Windows 10 Enterprise please continue following the below steps.
-
Next you need to check if you have at least 50GB of free space on your C drive. You can do this by opening File Explorer and clicking This PC.
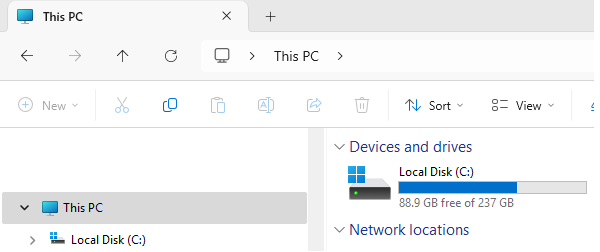
If you do have at least 50GB of free space, you should save and close everything that you have open. The upgrade process can take a couple of hours, and you won’t be able to use your computer during that time. If you have a laptop, make sure you have it plugged into power before you start this process. If it runs out of battery halfway through, you might not be able to boot it up at all.
-
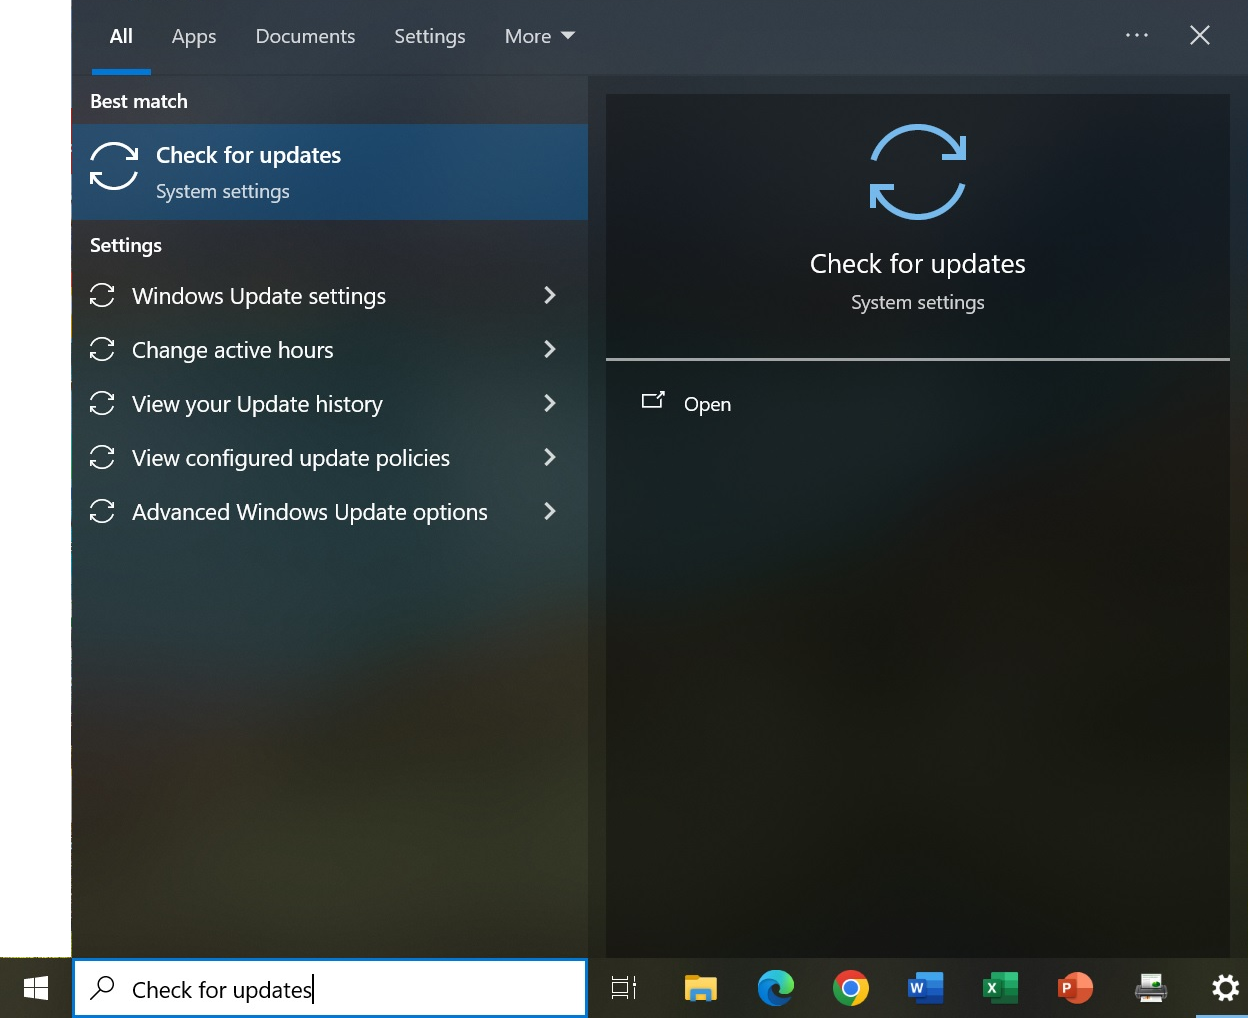
Next, click on the Windows Search Bar to the right of the Start button in the bottom left corner of your Desktop. Type Check for updates and click on the Check for updates option as shown.
-
Then click on the Check for updates button that appears near the top of the window.

Allow all pending updates to run and restart your computer as needed. Keep checking for updates. Eventually you should have the option to click on the Download and install button. When you are ready, click on the Download and install button.
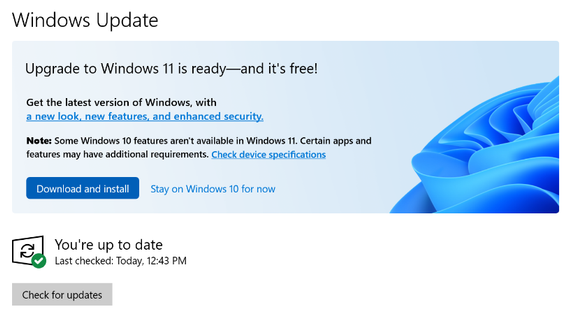
Note: During the download process you will still be able to use your computer normally if you want to, but it might be a little slow. (Note your prompts might look a little different, but just click the default options.)
-
Click Next on this window.
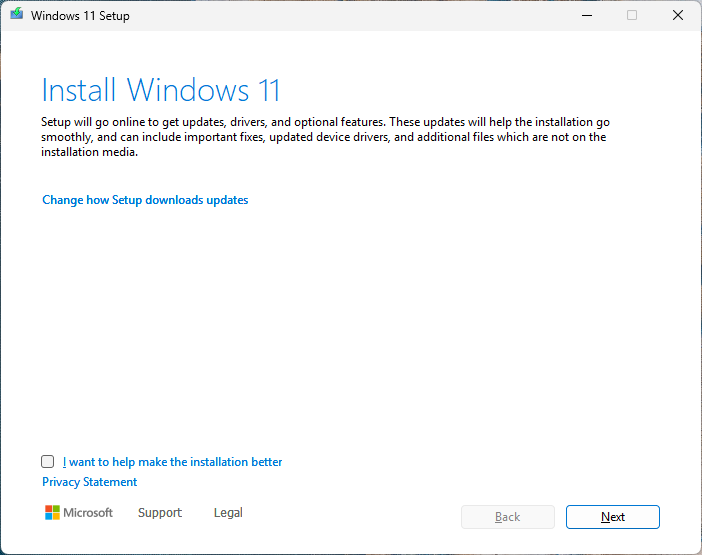
-
Click Accept.
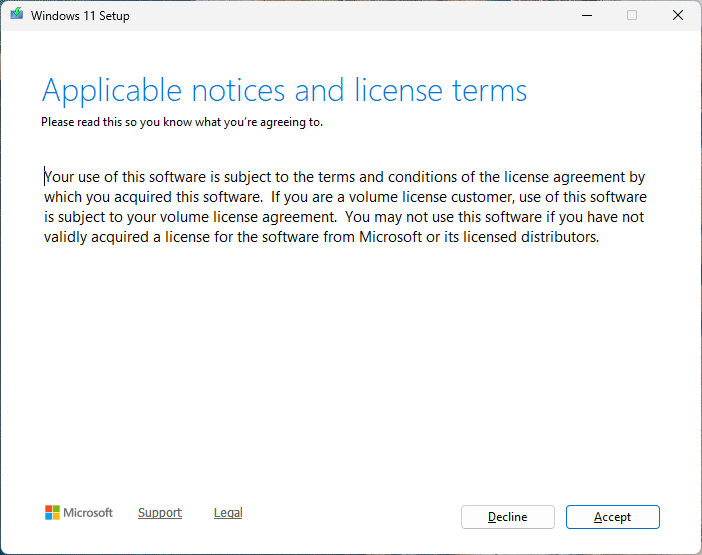
At this point, it will check for updates for up to 30 minutes.
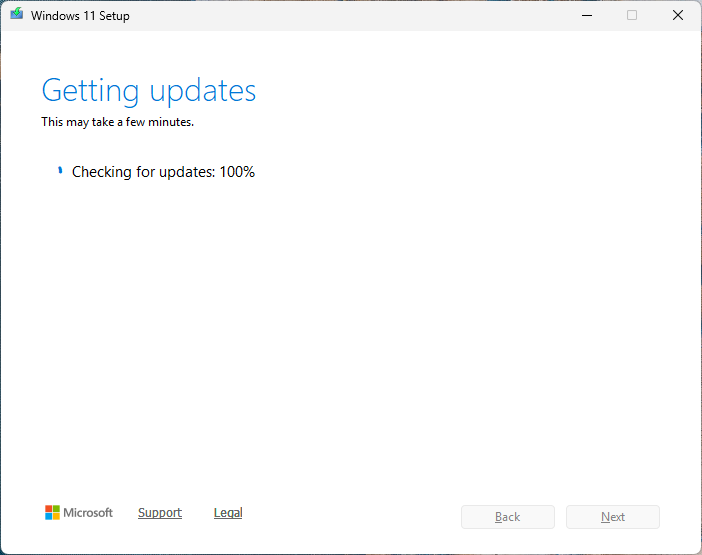
-
Eventually you should arrive at a window where you want to make sure both items are checked as shown. If they are both checked, click on Install. If they are not both checked or you get another window that warns you about incompatibilities, cancel the upgrade and email DCO at help@eecs.umich.edu.
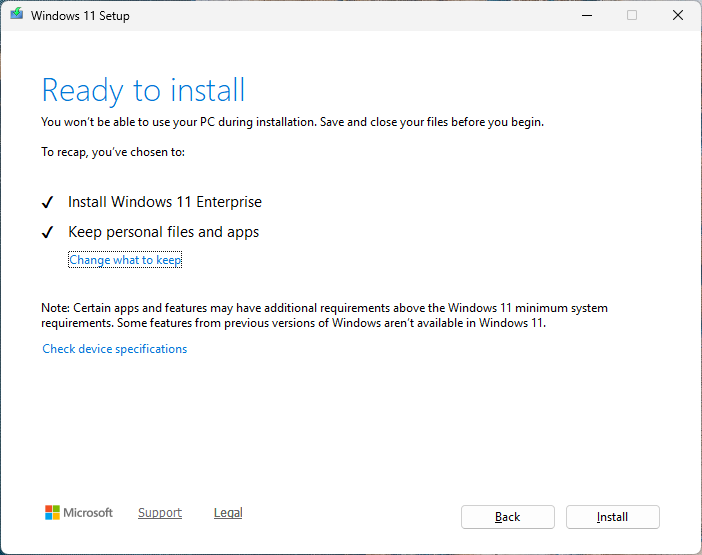
Note: After you click Install, the installation process will begin. During the installation process you won’t be able to use your computer and it will reboot multiple times on its own. Once the installation is complete, it should end at a point where you can press CTRL-ALT-DELETE in order to log in as usual. The first time you log in after the upgrade, it might take a while to load your user profile. Now your upgrade is complete.
Please email help@eecs.umich.edu if you do not get the above option or if you have any issues or questions. Please include your computer’s hostname and “Windows 10 to 11 Upgrade Help” in your subject line.
If you don’t feel comfortable doing the upgrade, please email us and we can pick up the computer from your office, or you can email us to coordinate a good time for you to drop it off in 2917 BBB. We should have it back to you within 24 to 48 hours.
|
|
|